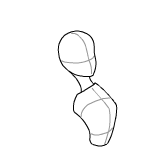
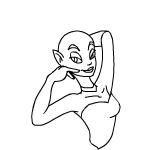
To start draw a basic head and body shape for your faerie. Divide the head and body into sections
as shown, this will make it easier for you to place arms, eyes etc. in the correct place.
Join the head and body together with a thin neck.
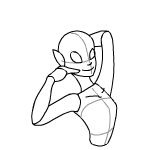
Add arms and hands like so. Remember every Faerie is different so if you want to vary the pose, that is fine.
Now add some facial details such as the eyes, mouth and nose. In this pose you will only be able to see one ear. Lastly
give your faerie some chest bones (two lines just under the neck).
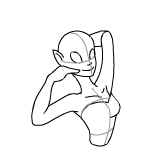
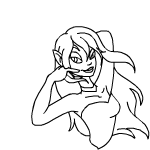
Erase some of your extra lines and you should be left with some thing like this. Draw on
your faeries dress and give the body a little more shape. Then draw a curved line just inside the
top of your faerie's ear.
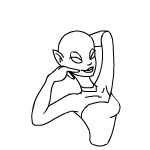
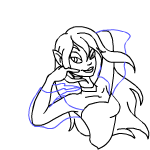
Erase the guidelines you drew on earlier and add a little detail to your faerie's mouth, eyes and ears.
If you want to add any necklaces or bracelets do so now. Lastly give your faerie some fingers.
Add pupils and eyebrows, then if you want to alter the dress now is a good time.
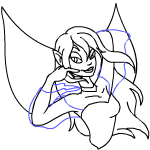
Draw hair onto your Faerie, as we mentioned earlier all Faeries are slightly different so you can be very creative
with your hairstyles if you want.
Put a little more detail into your faerie's hair.
Draw on the sleeves to your faerie's dress, like so.
Finally add the wings and your faerie is complete.
Adding colours and shading can really help your picture stand out, and really makes your image come alive.