How to draw the Tooth Faerie : Printable Version

Begin by sketching three simple shapes, which will form the Tooth Faerie's head, body, and hips.

Next, further define the Tooth Faerie by adding shape to her face, along with lines for her waist and thighs. Don't forget to draw a pair of circles for her shoulders and a neck to connect the Tooth Faerie's head and torso.

Lightly draw in her hair as a solid mass, sketching in some wavy lines for texture. Be sure to add a small triangular shape for her pointy left ear (your right). Next, draw in a pair of ovals, which will later become her hands. Just beneath the circle you drew to form her hips, make a wavy line for the hemline of the Tooth Faerie's skirt. Also, sketch a pair of upside-down arches to form her chest. Now, examine the image carefully and erase any excess lines that you might have.

Draw the top of a ponytail behind the rest of her hair. Next, add the end of her ponytail, plus a bit of fringe that curls around the right side (your left) of her face. Lightly sketch in a guideline that suggests the direction in which her face is pointed, as well as a short line to mark the centre of her nose. Then, add a pair of lines to indicate her collarbone, along with a V-shape for the neck of her dress. Draw in a set of arms to connect the Tooth Faerie^Òs hands to her body, then finish this step by adding in the lines of her skirt.

Add in some jagged lines to give the fringe above her forehead some texture. After adding some ruffles to her sleeves, draw in a few slanted lines on her right hand (which is closed in a loose fist) to give its fingers some definition. Draw a reverse L-shape on her left hand (your right), which will serve as her pinky finger, as well as a boomerang-shaped line to suggest her ring finger. Lastly, draw in a quartet of long, surfboard-shaped ovals for her wings.

Erase any excess lines, especially around the Tooth Faerie's hair. Then, carefully draw in two slightly pointed oval shapes for her eyes, along with a pair of curved lines above them for her eyebrows and a smaller triangle within her ear. Remember, her right eye (your left) will be smaller, because of the angle at which she's turned. Add a bridge for the Tooth Faerie's nose and a smiling mouth, then give her wings some additional texture with a few marks. Lastly, add the base of what will be a tooth to her hand, by drawing in a rock-like oval.

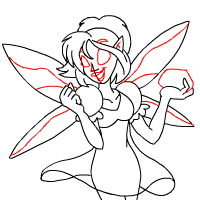
Add more details to her eyes by sketching in eyelids and pupils. Next, draw in a few more lines to finish her wings. Finally, give the tooth some shape and add four curved roots to the top of it.

Examine your drawing and remove any excess lines. Now would also be a good time to use a pen and go over your Tooth Faerie's permanent lines.

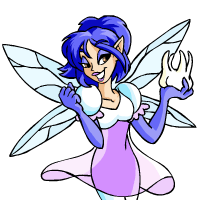
It's now time to colour! Use whatever method you prefer, whether it's coloured pencils or a computer program, to really bring your Tooth Faerie to life. Be sure to include shadows and highlights to really make her look nice!