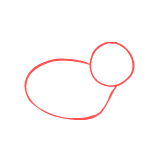
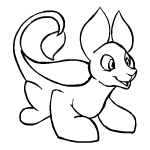
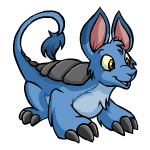
Begin by drawing a round circle head. Then connect an oval type body to it.
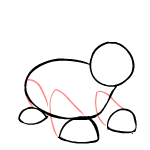
Next we want to draw the feet. This means drawing three half circles below the body.
Now that we have the feet we want to connect them to the body by drawing legs. Draw three
triangle shapes connecting the feet to the body.
Now that you have done that it is time to make them look more like actual legs. Erase the areas
lined in red.
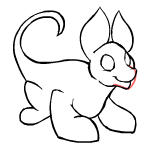
Now it is time to add a tail. Draw a curved line and then bring it back so it is broad at the base
where it connects to the Bori and narrow at the tip.
Next we will add ears and modify the head to make it look more like a Bori. The ears should be similar
to rounded triangles. Add a rounded triangle also to the bottom of the head circle to make the nose.
Erase all red lines.
Now we will give the Bori eyes and a mouth! Draw two circles for eyes and a couple of curved lines
for the mouth. Once again erase the red lines.
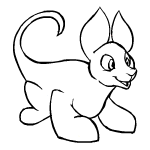
Now that you have a mouth and eyes you need to define them more. Next add a circle and a dot to each of the eyes.
Also define the mouth and nose area a bit more with a few more lines.
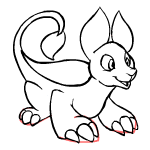
Now we need to add a few more details. Draw a pointy oval on the end of the tail to make a tuft.
After you have done that you need to draw a tear drop shape on the back of the Bori.
Next we want to give the Bori claws. Draw three triangles on each foot for claws, and don't forget to erase the
red lines.
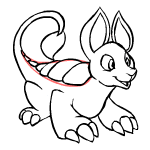
After giving the Bori claws we need to define the Bori's ears and back more. Draw rectangles in the tear-shape on
the Bori's back to make it look armoured. Also add a rounded triangle to the ears. Erase all red lines.
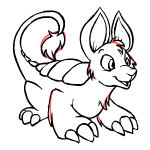
Let's make the Bori look fuzzy! Add jagged lines to the tip of the tail, face, legs, head, and chest. When you are done
erase the red lines.
Now it is time to colour your Bori any colour your imagination can come up with!