 Armed for Armada
by jacobhulsebus
--------
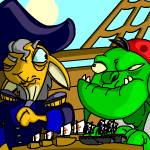
So, you've stumbled across two old seadogs pushing ships around a board. Based on the number of empty ErgyFruit Grog mugs, they've been here for some time. They appear a bit irritated. You may have become a bit curious about what drives them to continue playing. Wonder no more. The rules are quite simple, but the strategy involved is less so. I'll do my best to set your sails to favourable winds. The Basics You start with 12 ships. Your score is equal to the number of ships you have. With these ships, you can perform two types of moves. I'll refer to them as "Adds" and "Jumps". - Add: Click on a ship you control. Then click on any empty square within one space (including diagonals) of that ship. This will create a new ship on that spot. - Jump: Select one of your ships. Now choose any empty square two spaces away (including diagonals) of that ship. Your ship will soar to that space. This does not create a new ship. The game ends when one player cannot make any more moves. The player with the highest score at that moment wins. Now that you know how you can move your ships, it's time to discuss the game's main mechanic: capturing ships. When you place down a ship, all enemy ships next to it (including diagonally) become yours. Not only does this increase your score, but it causes your opponent's to drop like Stuff-A-Roo at the Festival of Neggs. Setting Sail Your destination is clear: control the most ships. However, plotting the course is the tough part. Each player will develop their own style, in time. Some may prefer aggressive approaches to always keep their opponents reacting. Others may favour a more defensive style that closes dangerous holes in a formation. I will share tips based on what I like and what goes through my mind while playing. 1. Start with Adds. You can't capture anything in the first few turns, so Jumps will not increase your score. I typically open by placing one ship in the middle of each line of 3 to form a 'T' shape. That's a defensive formation I like because it's more difficult for your opponent to Jump into. After that, I'll extend towards the opponent's closest ships and look for a safe Jump and cause havoc. 2. Watch your fleet's formation. By that, I mean avoid making shapes like 'C' and 'O' with your ships. If an enemy gets into the center of that, they'll capture a ton of your ships. Personally, I'm not fond of a straight line of 3 either. I find it tough to maneuver a ship in to reclaim what was yours. 3. Plan your Jumps carefully. A well-placed Jump can capture tons of ships. But beware! Your opponent can now squeeze a ship in where yours was previously. You may lose all of your gains and then some if you aren't careful. I find that Jumping two diagonally and one diagonally-one straight are the Jumps that I'm most likely to miss. It always seems too far, at a glance. Keep an eye out for these. 4. Calculate the score swing. To do this, add the number of ships you would gain from a move to the number of ships your opponent loses. For example, let's say you do an Add and capture 3 ships. The Add itself got you 1. You got 3 ships through capturing. They lost 3 ships through capturing. The score swing would be 1 + 3 + 3 = 7. To look at what we're figuring out in a different angle, let's say the score was initially 12 to 12. After making the move from the example above, you'd be winning 16 to 9. You went from being tied to winning by 7. Try to find the move that gives you the best swing. 5. Figure out your opponent's next likely move. I'm not saying you need to think 3 moves ahead. I don't usually have my next move planned out. A little forethought can do wonders, though. I feel this manner of thinking yields the greatest benefit without being too mentally taxing. As an example, let's say you can do an Add to capture 4 of the opponent's ships. Pretty good, right? However, if they capture 5 of your ships on their turn, you're worse off than you were before. Even so, this could still wind up being your best move. Preventing your opponent from capturing 5 might require you to Add without capturing anything. It's pretty safe to bet that they can capture a few of your ships somewhere else. 6. Never give up. It can be discouraging to be far down in the middle of a match. However, more ships for your opponent means you'll have more opportunities for capturing tons of ships. By the same token, don't get overconfident with a large lead. The True Sea Monster: Real Life There is one more thing worth mentioning: scheduling monthly competition games. Never expect your opponent to show up at the listed game time. I recommend neomailing them and nailing down a time. Don't wait until the last moment. You never know if a real-life Krawken will rise from the seas and prevent you or your opponent from making a time. It's also good courtesy to inform your opponent if you can't make the scheduled time. I've had games take 45 minutes to 1 hour and 30 minutes. It varies on how quickly you and your opponent perform moves. Keep that in mind when scheduling. Sometimes, you'll get an opponent that does not do anything. If an opponent does not move in 24 hours, you can click a button in-game to send a "Move or Lose" neomail. After it is sent, the opponent has 24 more hours to make a move. If they still don't move, a new button appears that gives you the win. Be sure to always check in at least once a day. That's Armada in a nutshell. I hope you found this guide helpful. For those of you as introverted as I am, I understand not being keen on dealing with a random player. Oftentimes, I don't want to. Armada is a pretty solid game, though. Give it a shot if you feel up to it.
| 


