 Bell’s Field Guide to Neopets Graphic Design
by belldandy213
--------
Ever wondered how all those awesome pet page graphics you see in the Site
Spotlight are made? What about those awesome userlookups that you see everywhere,
how are they made? These are the questions that millions of Neopians ask themselves
every day as they stare enviously at those beautified pages. It’s amazing how
these people do those beautiful pictures. Tell me, have you ever wanted to learn
how to make graphics like the ones that the famous Neopian artistes create?
If you answered yes to this question, then you have found the correct article
to read. I will be explaining to you how to create awesome graphics to beautify
your petpage and enhance your userlookup’s appearance.
Materials:
First off, what do you need to create something as good as that awe-inspiring
piece of art that is displayed in the background of that Art Gallery winner’s
userlookup? Obviously, you must have some sort of artistic skill, but you also
need other resources to aid you. You will need any image-editing software that
you can afford. Several inexpensive ones are in the market, and you might just
be able to scrape enough pocket money to afford one.
Second, it helps a great deal if you have a scanner. While it is not required,
you will find that it is much easier to sketch backgrounds and stuff by hand
and then color and edit them on your favorite image-editing software than to
do it straight on the computer.
How do you get this stuff? Well, if you have these resources available at
school or work, that’ll help. However, if you do not, then you can save up your
money until you can afford an image-editing program. Believe me, it’s worth
it. And in the mean time, just download free-trial image-editing software. The
time limits usually are pretty long (a month or two), so maybe two of them will
last you enough time until you finally save up enough for the program. Any image-editing
software will work, too, as long as it has layer capabilities!
I. The Basics: Drawing your image
Okay, so you have some image editing software to use now. But… now what? It
is about time, dear friend, you start drawing your picture. You may want to
draw by hand and then scan it in, but my example will be drawn directly on the
computer.
For drawing by hand, just take a pencil and lightly sketch a picture. Then,
take a pen and “ink” it (draw over the pencil with black ink). Scan the picture
onto your computer and then mess around with the resolution and such. Move on
to the next section after you are done with that.
Creating a drawing by computer, however, is slightly trickier. First, you
want to start out with a blank palette. Make a new file, and put in the size
of your image. In my case, I chose “500 by 500” as my file size.
Then, you will choose a brush style. Try experimenting with different styles
to see which one is right for what you want to do. Keep in mind that the “fill”
tool (the bucket thing) does not work very well with certain brushes, so you
may have to just color some drawings with the paintbrush.
Once you have chosen a brush to draw with, start drawing. Don’t penalize yourself
if you make mistakes here and there, and remember that that was what the “Undo”
button was made for: to Undo! While drawing, you can use fancy brush tips and
be creative. If you don’t get a line exactly, perfectly smooth, that’s okay.
When you color it you will see a HUGE difference in the quality!
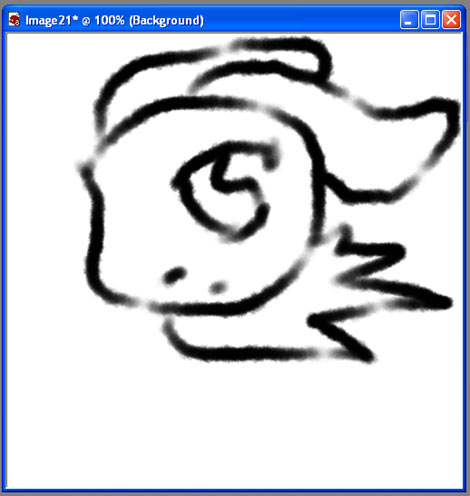
When you finish drawing, your image will look probably something like this
(in quality, I mean):

II. Coloring: Choosing your colors
Once you have drawn it the way you like, move on to the next step: Coloring.
Coloring is probably the trickiest part of making graphics because, if done
incorrectly, it could make your picture look very, very ugly. Contrarily, it
makes your picture look beautiful and “alive” (no, it will not eat you), so
to speak, if done correctly.
First of all, balance is a key factor. Which colors go well together and which
ones clash the most? Obviously two different shades of the same color will always
look beautiful together, but what about two entirely different colors? On a
general scale, yellows must only be used with soft, light colors (pastels are
preferable), while blue should be used with different shades of itself and cool
(purples/silvers/green) colors. Generally, “cool” colors should go with “cool”
colors, and “warm” colors should go with “warm” colors. A list of generic cool
and warm colors is located below:
Cool colors
Blue
Purple
Green
Silver
White
Warm colors
Red
Yellow
Orange
Gold
Black
Of course, as you experiment with color combos, you’ll find some warm and
cool colors go together quite well. Also, you will find certain colors should
never be meant to combined together in the first place. Just remember to keep
your colors as far from gaudy as possible, and you will succeed.
III. Coloring: filling in the white space
Now, arriving at the actual coloring itself, we see that a decision should
be made whether to use a paintbrush, paint bucket, or both for the actual coloring
of your drawing. One kind of criteria that may help with deciding what you should
use for coloring is the kind of paintbrush you used when drawing your masterpiece.
If you drew it by hand, then you will find that a paint bucket is most efficient.
If you used a fancy paintbrush on the computer to paint your graphic, however,
it might be easier to just use a paintbrush to fill in all of the white space
in your art.
Another thing you might want to consider is time. Coloring with a paintbrush
is terribly time-consuming and often tedious. If you have time to waste, however,
by all means, color this way. Paintbrush coloring appears better, is more detailed,
and shows typically much more effort. However, coloring with a paint-bucket
filling tool is a lot quicker, and still appears nice on any image. Either way,
both color your image just the same and look fine.
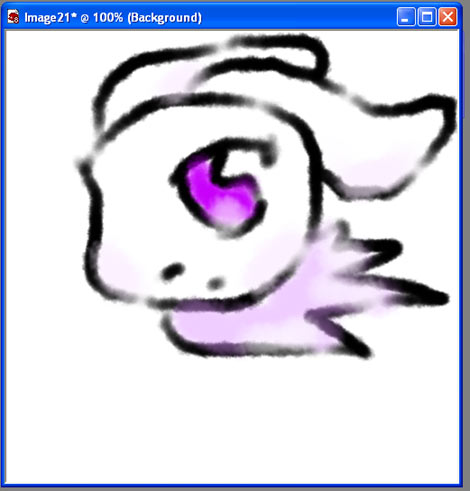
When you have colored your entire picture, you are ready to add shades and
highlights. Just lower the opacity of a paintbrush and use different sizes of
paintbrushes in a lighter or darker color (depending on whether you are shading
or highlighting).

Once you are finished with this, you may choose to add text or things like
that. Go right ahead! Plus, you can experiment with different effects and such
to see how to further enhance your image.
Here is the finished product I got after further image enhancement and addition
of text and stuff. I hope you have something as good, if not better, than this:

IV. Displaying on Pet Pages and Userlookups: Basic Formatting Info
Once you have finished your masterpiece, you are ready to display it on your
petpage or userlookup. In order to do this, you must upload the image and use
HTML or CSS to display it on your page.
In order to upload, you must have web space. There are many different free
web hosts to choose from that allow you to upload images onto their server.
For more information, contact me over Neomail about various free hosts for your
image.
Once you have uploaded, you must use HTML or CSS to display it on your page.
There are several ways to do this. One way is that you can display it as a regular
image with HTML. The code for this is provided below for your convenience:
< img src=”Yourimgurlhere” height=”number” width=”number” > (just take out
the spaces at the beginning and end)
Another choice is to use it as the background of your page. This can be done
in two ways: using HTML or CSS.
Most well known is the method for HTML. Handy as it is, however, it does not
allow you to do anything with the positioning and such. The code for this has
been provided below as well:
< body background=”yourimgurlhere” >
In addition, there is the code for CSS. While harder to understand, this code
allows one to do many, many things, such as positioning and such. However, at
this time, I think only the basic code is necessary. As you enrich your knowledge
of CSS and HTML further, you will discover the other things you can do with
the code. In addition, this is the right code for you to use for your userlookup.
Here is a basic code:
< style type=”text/css”> body{background-image: url(“yourimgurlhere”); position: center; background:
black;}
Those are only a few uses for graphics. Graphics can be used for many other
things. They can be used for navigation, banners, lookup banners/shields, and
more. As you experiment, you will find many things you can do with graphics.
The possibilities are endless.
Well, I hope you have benefited somewhat from this short tutorial on making
graphics, and I hope that now you too can make your dream lookup/petpage. For
more information, please feel free to neomail me. I’m glad to answer all questions!
|