 Talek's Trophy Tips: Wacky Wardrobe Adventures
by talekdolorn
--------
Ever wondered how to get that shiny golden trophy? Or chase up that elusive avatar? With guides abound, it has never been easier to get trophies. Everyone’s writing down tips, but you still can’t wrap your head around it? Talek will take you down the path towards the gamer superstardom. Follow this new series of “Talek’s Trophy Tips”, and every once in a while I will present you with a new tutorial how to make it to the top of the scoreboard. This article will provide a step-by-step tutorial and some advanced insight to reach that extra mile. NOTE: This step-by-step guide will set you on the path to stand the highest chance of getting a champion trophy after the monthly trophy reset. For the month-to-month evolution of the scores, consult Sabre’s TrophyTracker petpage. 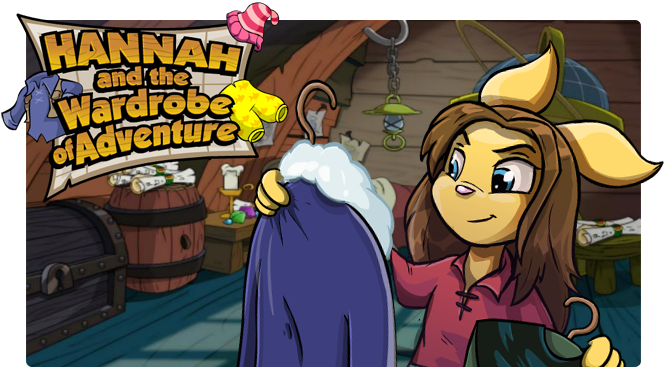 Wacky Wardrobe Adventures Now that we have successfully saved the world from wicked ghosts, shot down flying cooties and honed our craftsmanship in Moltara, time has come to take a hero’s rest. And what better rest could a hero imagine than a glamorous shopping trip with Neopia’s own resident heroine, Hannah. For the young Usul, however, the glitz and glamour of the changing room might well be the toughest challenge yet. And so, once again, it is up to you to save the day by accompanying the young Usul and helping her power through the dressing-up marathon. Basics The base principle of Hannah’s Wardrobe Adventure game is very simple: dress Hannah in the correct set of attire as described in the mission objective. During each mission you will have to choose and click on the 5 correct items - headgear, upper body, lower body, footwear and item. Each objective has a predetermined set of items, which are randomly sorted into five rows with left/right arrow-shaped buttons on either end. By clicking/holding the mouse button over the arrows you will scroll through the list of items until you find and click on it. Once selected, the item will be highlighted by a lime green glow. Once all 5 have been selected, you will click on the button below to check whether your choices were correct and, if so, you will be taken to the next mission. Progression To progress through the missions, you will have to collect at least 4 items per mission. However, in order to stand a chance of a trophy, you will have to make sure to collect all 5, as it will provide you with an extra hint (an exclamation point to the lower left of the main screen) you can use to automatically select 2 of the items correctly (at random) in the following levels. If unused, the hint can be carried over to the other level, but only one hint is available at any one time. The game is comprised of two distinct parts: 10 main missions, involving the wardrobe, and 3 bonus levels every 3 missions (after 3rd, 6th and 9th missions respectively). While the main missions follow the same principle of playing dress-up, the bonus missions throw you into a Hannah-themed version of Korbat’s Lab. This version tasks you to destroy all the blocks on the level whilst controlling the paddle with the mouse. Additionally, each bonus level contains a diamond, which adds 500 points if caught before destroying the last block. However, the bonus levels only give you a single life - failing to hit the ball will result in forfeiting a multitude of bonus points, so BEWARE. The three bonus missions feature a slightly different, increasingly complex layout, but are otherwise much simpler than the Korbat-led counterpart. (Fun fact: The theme of the bonus level depends on the last completed mission.) As such, Wardrobe Adventure is as much a memorisation game, as it is a reflex-based game, dependent on your proficiency of using the mouse. But do not let that discourage you - the game does not require pinpoint precision. Objectives/Item Sets There is a total of 10 different item sets/definitions within the game. As it is a text-based tutorial, the descriptions will not provide an adequate representation of the items used. Instead, this guide will try to provide some key tips to help you quickly identify the items. Recognising which item belongs to which set can be difficult. As such, one tip to memorizing them is sort them by colour scheme. Sets which feature multiple colours are more difficult, whereas monochrome sets are considerably easier. The list below is arranged in terms of recognisability. EASY Kiko Lake Boat Tours - The set is easily one of the most recognisable, featuring 4 yellow waterproof items as well as swimming goggles. It can sometimes be confused with the Sakhmetian Aisha attire. Osiri’s Collection - The set is defined by a Lost Desert/Sakhmetian motive (akin to Desert Aisha), featuring beige-gold upper body attire, golden sandals and a golden vase/urn. It is really easy to memorise, but when trying to complete the levels quickly can sometimes be confused with the Boat Tours’ attire. Faerie Queen’s Castle - The set has no connection to the name - instead it is completely based around the color purple/magenta. The only exception is the green hand-held flute. All items (including ear covers) are darker in color than the Grooming Parlour set. MEDIUM Grooming Parlour - The pink-coloured set is easy to recognise - pink mirror, pink blouse, pink pants and a blonde wig. However, it features cherry-red shoes that are otherwise relatively similar to the Faerie Queen’s Castle shoes, so be careful what you choose. Ice Caves - The set features blue/white-blue items and a pick-axe. The blue jumper can be confused with the Kreludan vest but is otherwise recognisable from its white woollen collar - much like the boots. Dr. Sloth - The set features space-themed items that are best recognised from a grey-orange hue (including the space helmet). The last item can be quickly recognised as it is attached to a string. Island Mystic - The set is made of multi-coloured items, making it easy to mistake items for other sets. All items, except the shirt, are light brown, while the shirt itself is pink, just a slightly different shade from the Grooming Parlour set. HARD Kreludan Mining Corp - The mining-themed set features very non-descript grey-brown boots, a miner’s helmet, a dark blue vest and a blaster. The boots and the baggy pants may be mistaken for other black pants, so be careful. Niten Hiroru - The monochrome ninja-themed set unsurprisingly melds into the environment. The dark red vest and the white paper shuriken are the most recognisable items, while the black puffed pants, the hood and the shoes may create some issues. King Skarl’s Collection - The most complex item set with no rhyme or reason. A gas mask, a fishing rod, grey-green boots, straight narrowing black pants and a vested shirt. Both boots and pants can be easily confused with their Kreludan and Ninja counterparts, so be careful. The following categorisation will further be referred to in the Trophy Run section, as it may help you to memorise the items, as well as strategically plan out when to use your hints and when to try and make the most of it. Scoring Wardrobe Adventure features a very straightforward scoring system: each piece of clothing correctly assigned gives you 20 points, for a total of 100 points per level. Additionally, each level has a time bonus of up to 100 points. Getting a high time bonus will be imperative during your trophy run, so make sure to be as quick as possible. The bonus levels are even more straightforward: you will get 500 points for collecting the diamond, 10 for every block destroyed, and an additional bonus for completing the level. The maximum bonus level point scores are static - you can get up to 2730, 2830 and 2880 total for each of the 3 bonus missions. Also, there is no time limit, so take your time and remember: losing the ball will forfeit you any more bonus points, so make sure to always keep the ball in check. By default, at the end of the game, you can expect the scores to range around 10200-10350, provided you get all the correct items and earn 80-95 bonus points per level. However, the difference is staggering: 80 points per level will cap you out at 10240, while 90 points per level will cap you at 10340 - more than enough for a solid reset score.    Trophy Run As with all the games, Hannah’s Wardrobe has become considerably easier to get a trophy in. Still, the high scores on the high scores table might seem intimidating at first glance. Never fear - even mid-month, but particularly during the reset night, this part of the guide will provide you the necessary strategy to improve your score and, with practice and good fortune, will carve you a pathway towards grandeur. Before we get into the thick of it, take heed: in spite of any practice you may undertake, the game does include a moderate amount of randomness, so just memorising the items will not guarantee a trophy. You will have to think fast and act fast. Also, it is impossible to know beforehand how many correct items will be visible from the get-go: sometimes you may be lucky to have 3-4 available, but others you will have only one or even none, diminishing your chances at a high time bonus. So what should I aim for, you may ask? On reset nights, average trophy scores range between 10275 and 10325 for bronze, and will continue to rise to 10355-10365 mid-month. Silver and gold will require around ~10340 and 10360 respectively (although there have been exceptions where 10340 is enough for gold). The champion score, however, will rise quite fast and you can expect to need more than 10370 points to attain that coveted champion status. Strategy So, the question is how do I get there, right? Well, there is no one way to get there - you may be talented, just need some practice and maybe not need the guide in the first place! Also, there well may be other ways to do it than what I advise. But for those of you who have come here, I will share what I have found to be a verifiable strategy that massively improved my game within a few hours of practice. In order to be able to do a trophy run, you will need three things: Memorise the item sets Make no mistakes Learn to maximise the time bonus (use the hint!) Before you start your trophy run, you will need to memorise the item sets for each mission. Some will be more difficult than others - and one good way to determine which is to categorise them based on their colour scheme and recognisability. The above categorisation was one I used in my trophy run. The yellow sets (Desert and Boat Tours) are easily the most recognisable, as are the pink/magenta ones (Parlour/Faerie). Kreludan Mining Corp and Skarl’s Collection are easily the most frustrating. Remember, though, these might not apply to you, and this is just one way to discern what is what. Throughout the game, it is imperative you make no mistakes - if you are fast enough, you might be okay making one or two slip-ups during the reset night for a 1290~ score. But for those who want to get to the top it will not suffice. Practise getting all 5 items right on each of your attempts - even before you focus on learning to improve your time bonus. Now, the most important part in my strategy is to learn to use the hint. Provided you get all 5 items right every time, every 2nd level you will be able to use the hint to auto-select two correct items. The way to use the hint is to quickly find 3 of the required items and then click on the hint button. Otherwise, the game may select the right item in one of the rows you are scrolling through - and thus you will be giving away precious time. The benefit of using hints will be two-fold: 1) for easier sets, you will be able to maximise the bonus (up to 94-98 bonus points); 2) for the more difficult sets, you will be able to focus on the more recognisable items (ie. blaster for Kreludan, shuriken for Niten Hiroru) and get the rest through the hint. Whichever the way it turns out (you cannot control which mission you get), it will inevitably give you 5 points extra in comparison to playing by default. Once you have learnt the benefits of using the hint, start to plan out your game. While you cannot choose the mission - they are given at random -, you can somewhat steer it by restarting the game until you get a favourable level from the get go. For example, if you have memorised the easier item sets by now, you can focus on getting an easy one first, so that there is a higher chance to get a more difficult one on the next level where you can use the hint. Or you can get that more difficult out of the way so you have fewer later. Likewise, remember the sequence of levels where you can use the hint: 2, 4, 6, 8 and 10. Level 2 and level 8 will be in the first (levels 1-3) and third (levels 7-9) set of missions, thus you will only be able to use one hint in those 3 level sets. While this may be less important on level 2, if all you have remaining by the 3rd set (level 7-level 9) are the difficult item sets, it will be much more difficult to reach a high score. Depending on what you prefer, you can aim to get the hardest ones first, or hope for the hardest ones to hit between levels 4-6. Let us summarise it all again: a good strategy will involve restarting the game to get a favourable start, using the hint on every 2nd level, making sure to max out points in the bonus rounds. Maximising time bonus on normal missions will come with practice. As you learn to get more and more bonus points, setting point targets for each level/each three-level set in between bonus missions will help you track your progress and know where you are at halfway through the game. Levels 1-3 So how did I do it? One way to ensure all of my advice gets put into context is to provide a sample of how I planned out my game - from bronze to gold. First of all, I wanted to know what score I will be aiming for. 10300 - 86 time bonus points per level 10310 - 87 time bonus points per level 10320 - 88 time bonus points per level 10330 - 89 time bonus points per level 10340 - 90 time bonus points per level 10350 - 91 time bonus points per level 10360 - 92 time bonus points per level 10370 - 93 time bonus points per level I was attempting to attain the trophy a week after the reset thus the scores were a little higher. I needed 10354 points for bronze, which meant I needed roughly 91.5 bonus points per level. First of all, I learned the basics and memorised the items. Once I learned to consistently get at least 90 points per level, I restarted the game until I got a favourable mission. Not only that, I also tried to take a glance at how many items are available from the get-go. While it is possible to get 4 or maybe even 5 items right from the start, I hoped to have at least 2. During the bronze run, my sole focus was to get above 90 points per level, so after level 3/before the first bonus mission, I hoped to have at least 575-577 points. Surely, it was impossible to have the same amount of points each time - sometimes it would take time to find the right item and I would get considerably less. So I zoned in on the average after 3 levels. Knowing I will have a hint on level 2, I hoped to get at least 90-92 points on level 1, hoping to get 91-94 points on level 2. Likewise, I would not let myself drop below 90 points on level 3, so I reach my average. When I attempted to go for gold, I needed 10375 points (93.5 bonus points per level). The strategy was roughly the same - except I tried to average 94 points per level (580-582) after level 3. As such, I would try to get 93-95 on level 1, 95-97 on level 2, and 92-94 on level 3. The more points I got early, the more I could lose out on in later stages if things did not go perfectly. If at any point I faltered, I restarted. However, for bronze runs, particularly reset runs, you can allow yourself far more leeway (aim for 570 or even 560 instead), especially while you are learning the ins and outs of the game. Levels 4-6 Levels 4 to 6 worked roughly the same way, with the sole exception that I had two hints to use: one on level 4 and one on level 6. Given the fact that I would not likely get more than 1 hard level out of the way during the first 3 missions, I would likely have to deal with at least one, if not two, during this set. For the bronze run, I solely focused on getting over 90 points, and was less focused on maximising the points (anything over 3880 was good enough after level 6). For the gold run, I hoped to continue my streak and end up with over 3890 points (preferably at least 3892). Levels 7-9 & 10 For subsequent levels there were no particularly strategic nuances - the game was pretty much decided during the first 6 levels, provided I did not mess it up. If my goals were met after level 6, I just zoned in on completing the game, making sure to get all the points from bonus missions. If not, I would restart, unless I was 1-3 points short. In that case, I would look at what I got after the bonus mission following level 9. That served as a good point target for me - depending on your proficiency, you would have anywhere between 10100 and 10190 at this juncture. In case of bronze trophy, I knew that with an average of 90 points, I need to have at least 10165 to achieve bronze. On my champion run, I hoped to have 10185 and above. Otherwise, I would restart as there would be little point in finishing level 10. In the end, I managed to reach gold with a final score of 10378, averaging over 93.5 points per level. End Note This was the end of the fourth edition of Talek’s Trophy Tips on Hannah and the Wardrobe of Adventure. Compared to the other games in the previous editions, this may well be one of the easier trophies to acquire during reset. With proper strategy, keeping up with the threshold milestones and trial & error, you will be able to reach it in no time. Oh, and remember: use the hints! For any other games, look out for further trophy tips in future editions of the Neopian Times. *** Struggling to get a trophy? Want tips on a certain game? Neomail me and I will consider including the game in an upcoming article for Talek’s Trophy Tips. Thank you to Sabre’s TrophyTracker petpage for the average reset scores and JN for helping with memorisation.
|